
7 Simple Steps to Cook Using an Induction Cooker
Many people struggle to get consistent results when cooking with an induction cooker. You’re not alone—choosing the right pan, controlling the heat, and avoiding spills can feel confusing at first. These simple steps will help you cook confidently and safely.
To cook with an induction cooker, first test your pan with a magnet and choose a flat, compatible base. Place the cooker on a stable, dry, ventilated surface. Center the pan, add food carefully, and start at a low or medium setting.
Increase heat gradually when needed, then adjust it as ingredients cook. Prevent spills by leaving space and using mitts. Turn off, unplug, cool, and wipe the surface.
The steps below offer helpful details for confident cooking.
Key Takeaways
- Check that your cookware is induction-compatible, magnetic, flat-bottomed, and appropriately sized for the cooking zone.
- Place the cooker on a stable, level, heat-resistant surface and connect it to a suitable grounded outlet.
- Center the pan, add ingredients carefully, and select a low, medium, or high setting based on the recipe.
- Monitor bubbling, browning, texture, and moisture, adjusting the power gradually to maintain the desired cooking temperature.
- Turn off and unplug the cooker, let everything cool, then clean it with a soft damp cloth and store it safely.
Make Sure Your Cookware Works on Induction

Before you start cooking, check that your cookware is compatible with induction heat. Induction cookers create a magnetic field, so your pots and pans must contain magnetic metal.
Induction cooking requires cookware with magnetic metal so the pan can interact with the cooker’s magnetic field.
For reliable cookware compatibility, place a magnet against the base. If it sticks firmly, the pan will usually work. If it doesn’t, choose another piece.
Look for induction friendly materials such as cast iron, enameled cast iron, and magnetic stainless steel. Some stainless-steel pans contain too little iron, so always test them rather than relying on the label.
Manufacturers often mark compatible cookware with an induction symbol, typically a coil-shaped icon, on the base or packaging.
Your pan should also have a flat, smooth bottom that sits evenly on the cooking surface. Warped or rounded bases may heat poorly.
Match the pan’s diameter to the cooker’s marked cooking zone for more consistent results. Avoid glass, ceramic, copper, and aluminum pans unless they include a magnetic layer designed for induction cooking.
Set Up Your Induction Cooker Safely

Place the induction cooker on a stable, heat-resistant, level surface with plenty of space around its vents. Good appliance placement keeps airflow clear and helps prevent overheating.
Keep the unit away from sinks, splashing water, damp countertops, curtains, paper, and other flammable materials. Before you plug it in, inspect the cord and plug for cuts, exposed wires, or damage.
For electrical safety, connect the cooker directly to a properly grounded wall outlet that matches its voltage requirements. Don’t use an extension cord, power strip, or outlet that feels loose.
Keep the cord away from hot surfaces and position it where you won’t snag or trip over it. Make sure your hands and the cooker’s controls are dry before handling the plug.
Don’t place anything on the appliance when it’s operating. Read the manufacturer’s safety instructions, and keep children and pets away from the cooking area.
Unplug the cooker when you’re finished or before cleaning it.
Add Food and Start at the Right Heat
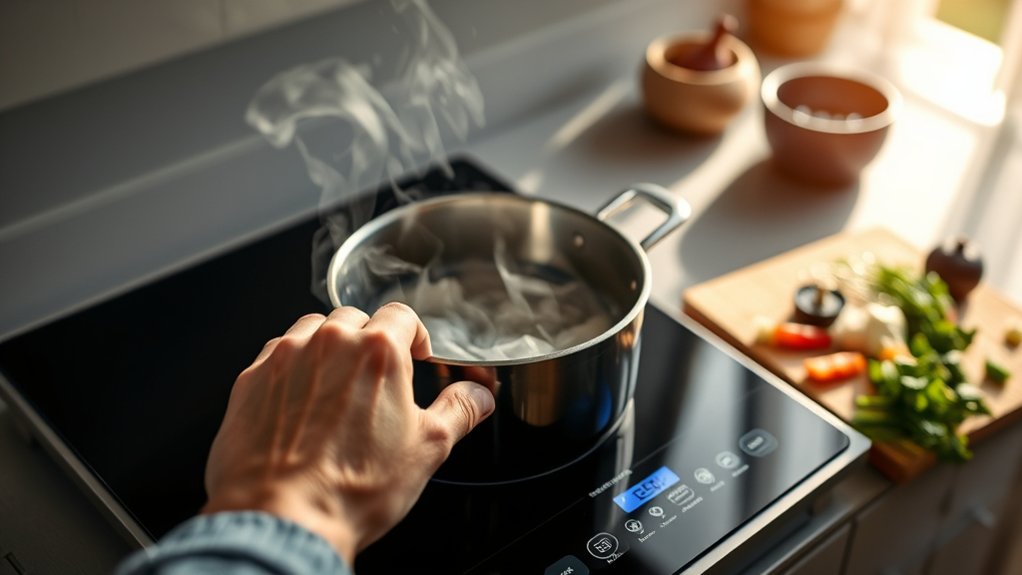
Add your ingredients carefully to the preheated pan to prevent splatters. Start with the heat level your recipe calls for, rather than turning it up too high. Adjust the temperature as needed while you cook for better results and more efficient cooking.
Add Ingredients Carefully
Once the cookware is centered on the induction zone, add your ingredients and start with the heat level the recipe recommends. Follow each ingredient measurement before anything enters the pan, and keep premeasured items nearby.
Add food in the order your recipe lists, giving dense vegetables or proteins room to contact the surface. Use a careful seasoning addition so salt, herbs, and spices distribute evenly rather than clumping.
Don’t overcrowd the cookware; work in batches when necessary, and add liquids slowly to prevent splashes.
| Action | Benefit |
|---|---|
| Measure ingredients | Keeps proportions accurate |
| Add items gradually | Prevents splattering |
| Leave space | Encourages even contact |
Stir gently with suitable utensils, and watch for spills around the cooking zone. Wipe the control area promptly, but don’t move the cookware unnecessarily while you’re adding food.
Choose the Right Heat
Set the induction cooker to the heat level your recipe recommends before adding food, then adjust it promptly if the pan heats faster or slower than expected. This approach helps you begin with suitable temperature control and prevents delicate ingredients from scorching.
Match the setting to your pan and recipe: use low power levels for melting, warming, or simmering; choose medium heat for sautéing and gentle frying; select high heat when you need rapid boiling or searing.
Because induction cookware responds quickly, make small adjustments rather than jumping between extremes. Watch how the food reacts after you add it, and lower the setting if oil smokes or ingredients brown too quickly.
If cooking slows noticeably, raise the heat slightly. Keep the selected level appropriate for the food’s required temperature throughout this step.
Start Cooking Efficiently
When the pan reaches the recommended temperature, add your ingredients and begin cooking at the recipe’s suggested heat level. Induction cookers respond quickly, so avoid turning the setting too high “to speed things up.”
Instead, add food in an even layer, leaving space for browning and consistent cooking. Use the correct pan size, and keep its base centered over the cooking zone.
Before you start, arrange ingredients, utensils, and seasonings within reach. Good kitchen organization helps you work smoothly and prevents distractions while the pan is hot.
For cooking safety, use dry hands, keep handles away from the edge, and never leave active cookware unattended. Watch the food closely, adjusting the heat promptly if it browns too quickly.
Stir, flip, or cover ingredients as your recipe directs, then turn off the zone when finished.
Choose the Right Induction Heat Setting
Choose a heat setting that suits your ingredients and cooking method. Use lower heat for delicate foods, and turn it up when you’re boiling or searing. Adjust the heat gradually to prevent your food from overcooking.
Match Heat to Ingredients
Match the induction heat to the ingredient and cooking task: use low heat to melt butter or simmer sauces, medium heat to sauté vegetables and cook proteins, and high heat only to boil water or sear food quickly. Consider ingredient pairing when selecting a setting.
Delicate foods, such as fish, eggs, and leafy greens, need gentle heat to prevent sticking, scorching, or drying out. Firm vegetables, chicken, and ground meat generally respond well to medium heat, which supports steady browning and thorough cooking.
Choose cookware that fits the induction zone so heat distribution remains even across the base. A heavy, flat-bottomed pan can hold consistent warmth for soups and braises, while a lighter pan reacts quickly for sautéing.
Match the setting to your recipe’s texture, moisture, and desired browning.
Adjust Settings Gradually
Start at a lower heat setting, then increase it gradually until the pan reaches the temperature your recipe needs. Induction responds quickly, so small adjustments provide precise temperature control and help prevent scorching.
Watch the food, not just the display, and reduce power when bubbling becomes vigorous. Use these practical cues:
| Cooking goal | Suggested action |
|---|---|
| Warm gently | Begin low and stir often |
| Sauté vegetables | Increase to medium gradually |
| Simmer sauce | Lower power after bubbling starts |
Keep your cookware centered on the cooking zone for even heating. If the pan gets too hot, lift it briefly or switch the cooker off. Don’t splash water into hot oil.
Follow safety precautions by using dry handles, protecting your hands, and keeping the surface clear. You’ll gain better control when you wait a moment between adjustments, allowing the pan and ingredients to respond.
Adjust the Heat as Food Cooks
As the food cooks, adjust the heat to maintain the right simmer or sear rather than leaving one setting unchanged. Watch how quickly liquids bubble and how firmly ingredients sizzle, then lower or raise the power in small steps. Induction responds quickly, so you won’t need long pauses between adjustments.
Use temperature control to match each cooking stage. Start higher to bring water or broth to a boil, then reduce the setting once bubbles appear. For sautéing, lower the heat when ingredients brown too quickly, or increase it when cooking slows after you add cooler food. Stir occasionally so heat distribution stays even throughout the pan.
If your recipe calls for a gentle simmer, look for occasional small bubbles instead of vigorous boiling. Keep checking texture, color, and moisture as cooking continues. With practice, you’ll learn how each power level affects your pan and can make timely changes confidently.
Prevent Spills, Burns, and Pan Damage
Keep the cooktop and pan stable to prevent spills, burns, and damage. Center your induction-compatible pan over the cooking zone, and choose a size that matches it.
Don’t slide, drag, or shake the pan. Lift it gently to protect the glass surface.
For effective spill prevention, avoid filling cookware beyond two-thirds full, especially with boiling liquids. Turn handles inward so you won’t knock them, and use a lid loosely if food splatters.
For burn safety, use oven mitts when touching hot handles, lids, or cookware. Keep your hands, sleeves, and towels away from the active zone, which can heat from the pan’s surface.
Never place metal utensils, cans, or empty cookware on the cooktop.
| Risk | Smart choice | Visual cue |
|---|---|---|
| Overflow | Leave headroom | Calm, clear rim |
| Sliding pan | Lift, don’t drag | Smooth surface |
| Hot handle | Turn inward | Safe countertop edge |
| Scalding lid | Open away | Rising steam |
Watch simmering food closely, and lower the heat before bubbling becomes violent.
Turn Off and Clean the Induction Cooker
When cooking is finished, turn off the induction cooker and let the pan cool before moving it. Press the power button, then unplug the unit if your model allows it. Don’t touch the glass surface immediately; residual heat can cause burns. Your safety tips should include keeping children away until the display and surface feel cool.
Begin your Cleaning routine by wiping spills with a soft, damp cloth. For dried food, place a little warm, soapy water on the spot and wait a few minutes before gently lifting the residue with a cooktop scraper.
Don’t use steel wool, abrasive powders, or harsh chemicals, because they can scratch or damage the surface. Wipe away soap with a clean, damp cloth, then dry the cooker with a microfiber towel.
Clean the control panel carefully, preventing moisture from entering openings. Check the cord and surface for damage before storing the cooker in a dry, protected place. Never immerse the appliance in water.
Frequently Asked Questions
How Much Electricity Does an Induction Cooker Use?
You’ll typically use 1,200–1,800 watts on a portable induction cooker, though power varies by model and heat setting. Running a 1,500-watt unit for one hour consumes 1.5 kilowatt-hours (kWh).
Because induction heats cookware directly, its Energy efficiency often reduces electricity use compared with gas or traditional electric stoves. Faster Cooking speed also shortens operating time.
Check your appliance’s wattage label, then multiply watts by hours used and divide by 1,000.
Can Induction Cooking Affect Pacemakers or Other Medical Implants?
Medical safety depends on your implant’s design and the cooker’s magnetic field. About 6 million people worldwide use pacemakers, so implant interference matters.
Most modern pacemakers and defibrillators tolerate household induction cookers when you maintain the manufacturer’s recommended distance, often at least 60 centimeters (24 inches). Don’t lean over the active hob or place the device directly above it.
Check your implant manual, ask your cardiologist, and follow the cooker’s instructions.
Why Does Induction Cooking Make Clicking or Buzzing Noises?
Induction cooking makes clicking or buzzing noises because its electromagnetic field rapidly switches on and off, creating vibrations in the cookware and internal electronics. You may hear louder sounds when you use high power, lightweight pans, or cookware with uneven layers.
For induction safety, keep the cooktop clear and use compatible, flat-bottomed pans. To improve noise reduction, lower the heat, center the pan, and choose heavier, well-constructed cookware. These sounds usually don’t indicate a problem.
Can I Use an Induction Cooker During a Power Outage?
No, you can’t use an induction cooker during a power outage because it needs electricity to generate heat. For power outage survival, keep alternative cooking methods available, such as a gas stove, camping stove, outdoor grill, or portable butane burner.
Never use fuel-burning appliances indoors unless they’re specifically rated for indoor use, since carbon monoxide can accumulate. Keep backup fuel, ventilation supplies, and a fire extinguisher ready, and follow local safety guidance during emergencies.
How Long Do Induction Cookers Typically Last?
A stitch in time saves nine: you can expect an induction cooker to last about 8–10 years with regular home use, though premium models may reach 15 years. You’ll extend its life by cleaning spills promptly, avoiding impacts, and following the manufacturer’s instructions.
Practice induction safety by keeping vents clear and inspecting cords. Check cookware compatibility before use, because unsuitable pans can trigger errors or strain the appliance unnecessarily over time.
Conclusion
Cooking with an induction cooker is simple once you follow these seven steps. Check your cookware, set up safely, choose the right heat, and adjust it as your food cooks.
Since induction heats pans quickly, you’ll often notice your meal reaches the perfect temperature just as you finish seasoning it—a convenient coincidence.
Prevent spills, protect your cookware, then switch off and clean the surface. With practice, you’ll cook efficiently, safely, and confidently with an induction cooker.