How to Identify the Parts of a Stove
Many people struggle to identify the different parts of a stove, especially when choosing the right model or cleaning it safely. You’re not alone—understanding burners, controls, oven components, and cooking surfaces can feel confusing. This guide makes it easier to recognize each part and compare stove options with confidence.
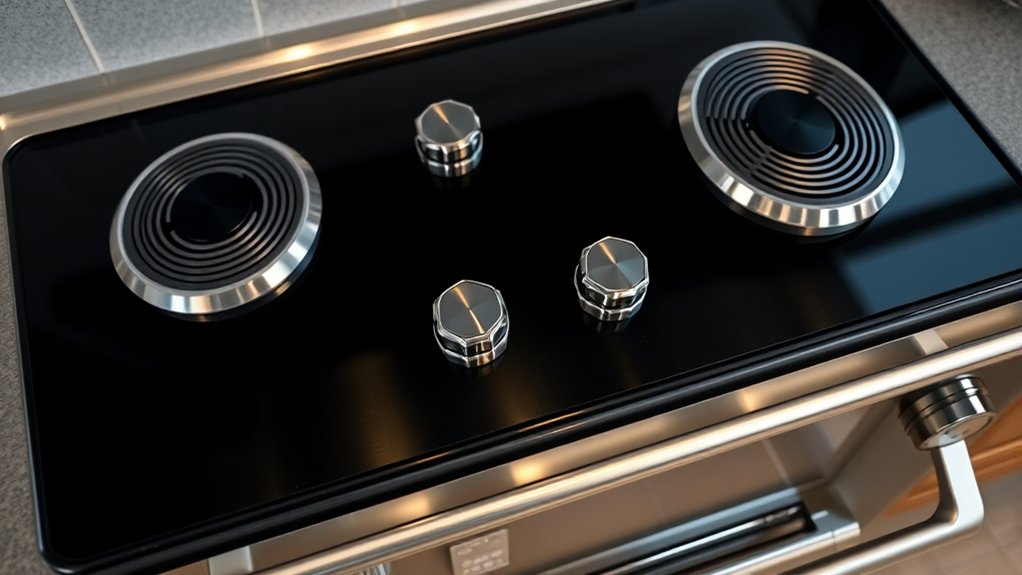
To identify the parts of a stove, separate the flat cooktop from the control panel and oven. Look for gas burners with flames, electric coils or radiant circles, and induction zones marked on the surface. Removable grates or drip pans sit beneath burners.
Inside the oven, find racks, supports, lighting, and upper or lower heating elements. Check your manual for model-specific labels, and keep controls, surfaces, and components clean. The sections below explain each part and its care.
Key Takeaways
- Identify the cooktop as the flat surface containing gas burners, electric coils, radiant elements, or induction cooking zones.
- Locate controls separately; knobs, switches, or touch panels adjust corresponding burners, oven functions, and temperatures.
- Recognize the oven by its door, handle, window, racks, light, and enclosed cooking cavity beneath or beside the cooktop.
- Identify oven elements: the lower bake element, upper broil element, rear convection fan, or concealed heating element.
- Check grates, burner caps, drip pans, indicator lights, and labels. Use the owner’s manual for model-specific identification.
Identify the Main Stove Parts
Start by identifying the stove’s main parts: the cooktop, burners or heating elements, control knobs, oven, oven door, racks, and drip or crumb trays. Each component serves a distinct purpose, so learn what it does before you operate the appliance.
The cooktop supports your cookware and contains burners on gas models or heating elements on electric and induction models. Control knobs or touch controls adjust heat, while indicator lights may show when surfaces remain hot.
Below, the oven provides enclosed cooking space, and its door helps retain heat. Adjustable racks position dishes at different levels. Drip or crumb trays catch spills, making cleanup easier and helping prevent smoke.
As you identify each part, check labels and your owner’s manual for model-specific features. Knowing the layout improves Stove safety because you’ll recognize hot surfaces, moving racks, and controls quickly.
It also supports Energy efficiency: you can choose the correct burner, avoid unnecessary preheating, and keep heat contained.
Separate the Cooktop, Controls, and Oven
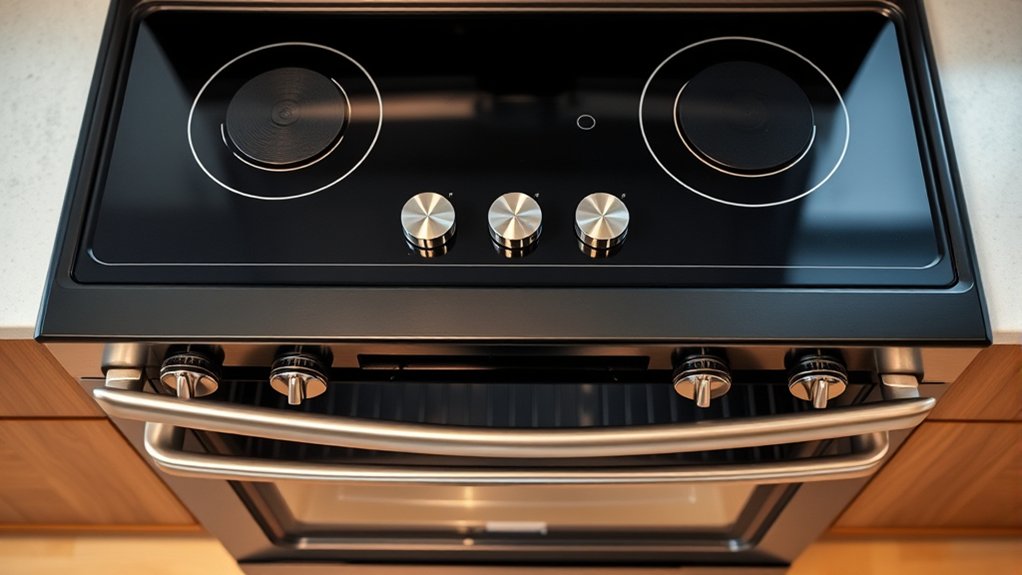
Separate the stove into three areas: the cooktop, the controls, and the oven. The cooktop is the flat upper surface where you place cookware. Don’t confuse its surface with the controls, which may sit along the front, back, or side.
A stove has three distinct areas: the cooktop for cookware, controls for settings, and the oven for baking and roasting.
These switches, knobs, or touch panels let you select settings and adjust heat without being part of the cooking surface.
Below the controls, you’ll usually find the oven cavity. Open its door to locate the racks, interior walls, and light. On some models, the oven sits beneath the cooktop; on others, you’ll find a separate wall oven.
Identify each area before operating the appliance so you can use the correct control and avoid accidental activation.
For stove safety, keep control labels visible and learn which controls correspond to each function. Clear separation also supports energy efficiency: you’ll operate only the area you need and avoid opening the oven unnecessarily.
Check your manual for model-specific layouts and symbols.
Identify the Cooktop Burners
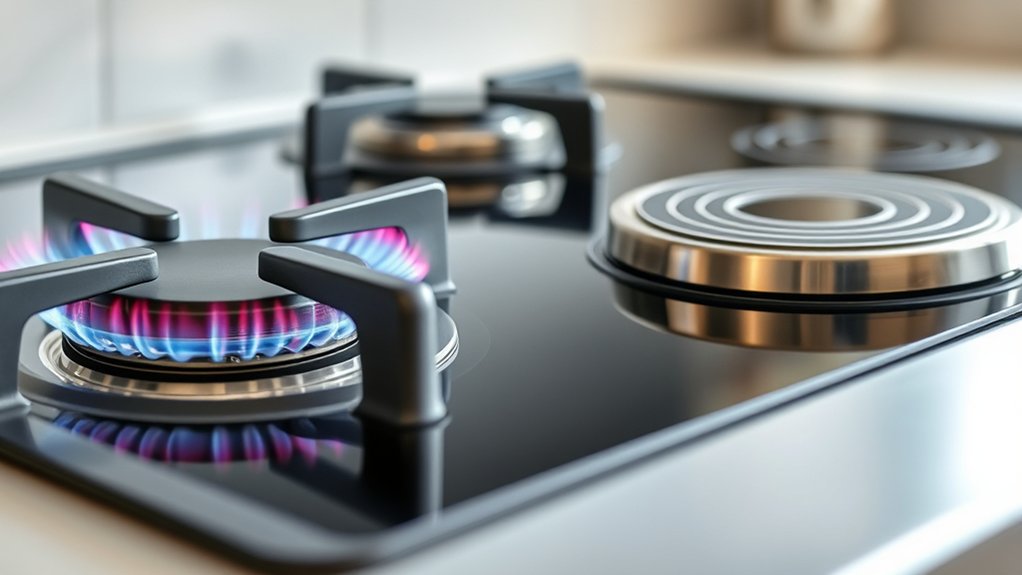
Once you’ve identified the cooktop, locate its burners by looking for the heating elements or marked cooking zones on the surface. Electric models may show solid coils, smooth circles, or radiant outlines. Gas models typically have circular burner locations beneath the surface openings, while induction tops use printed rings without visible heat sources.
| Burner clue | What you’ll notice |
|---|---|
| Coil | Raised metal spiral |
| Radiant | Smooth glass circle |
| Gas | Circular flame area |
| Induction | Printed zone, cool surface |
Match each zone to its control knob or touch button, then note its size. Large burners suit wide cookware, while small burners work best with compact pans.
Keep your hand away from any zone that may still be hot, and watch for residual-heat indicators. For Stove safety, confirm the burner is off after cooking.
Choosing a similarly sized pan supports Energy efficiency by directing heat where you need it. Don’t confuse burner markings with nearby controls; identify the cooking zones first.
Understand Burner Grates and Drip Pans
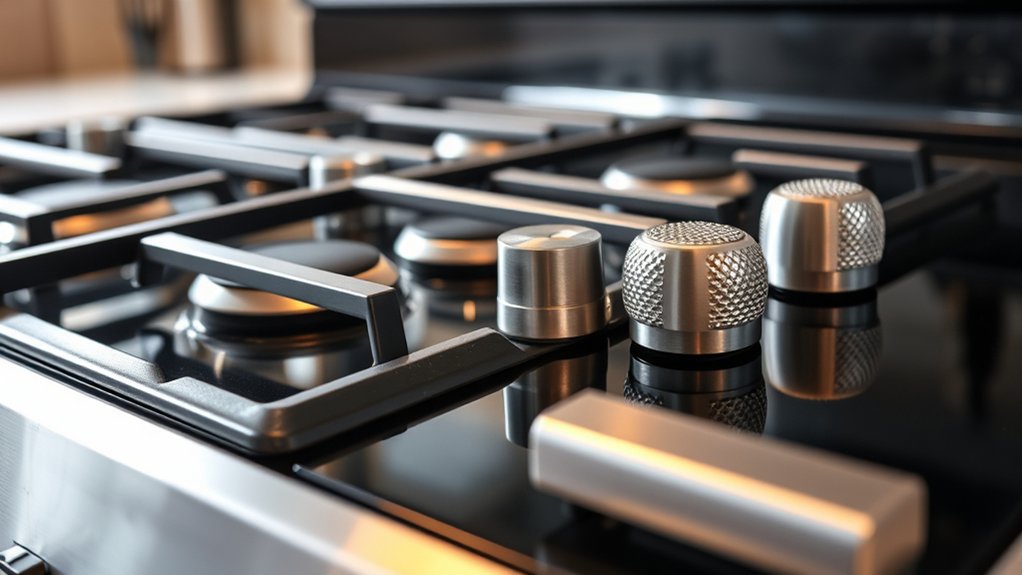
Look beneath the cooktop burners to identify the removable grates and drip pans. Burner grates support your pots and pans above the flame or heating element.
You can usually lift them off without tools, but check for locking tabs before removing them. Their material may include cast iron, steel, or enamel, and each type requires appropriate care to prevent damage.
Drip pans sit beneath burners and catch spills, grease, and food particles. On some stoves, you’ll find one pan under each burner; other models use a single recessed cooktop surface instead.
Remove cooled drip pans carefully, then wash them with warm, soapy water. For baked-on residue, soak them before scrubbing with a nonabrasive sponge.
Replace warped, cracked, or heavily corroded pans because they may collect debris poorly. Reinstall every grate and pan securely, ensuring each piece sits flat and doesn’t wobble when you place cookware on top during cooking.
Find the Stove Knobs and Control Panel
Identify the stove’s knobs and control panel along the front or back edge of the cooktop. You’ll usually find one knob for each burner, plus controls for the oven, timer, temperature, or special cooking functions.
Look for printed labels, burner symbols, and indicator lights that show which heating element you’ve selected. On a touch-control model, tap the marked panel rather than turning knobs.
Check labels, burner symbols, and indicator lights carefully; touch-control models require tapping the marked panel instead of turning knobs.
Check that each control moves smoothly, responds correctly, and returns to the off position. During appliance maintenance, wipe the panel with a soft, slightly damp cloth after the surface cools.
Don’t spray cleaner directly onto controls, and avoid abrasive pads that can remove labels. For stove safety, confirm that you can read every setting clearly and identify each burner without guessing.
Keep handles, utensils, and spills away from the controls, since buildup can interfere with operation. If a knob feels loose or a button fails, stop using that function and arrange professional service.
Identify the Oven Door and Window
Find the oven door below the cooktop, and check its window for a clear view of the interior. The oven door forms the hinged front panel that opens to give you access to the baking chamber.
Look for a handle along its upper edge, then pull it gently toward you. Most doors lower smoothly and rest horizontally, while some models open in stages or lift away for cleaning. Don’t force the hinges if the door feels stuck.
Examine the oven window, usually set into the door’s center. Its heat-resistant glass lets you monitor food without opening the oven and losing heat.
Check that the glass sits securely in its frame and doesn’t show cracks, chips, or cloudiness between layers. A surrounding seal helps retain heat, so inspect it for gaps or damage.
Use the door’s exterior finish and handle to distinguish it from the drawer or storage compartment beneath the oven.
Locate Oven Racks and Supports
Open the oven door and locate the horizontal racks inside the baking chamber. These removable shelves support cookware and slide along formed rails or mounted brackets. Check their edges, spacing, and locking tabs before you adjust them.
> Locate the oven’s horizontal racks and inspect their rails, spacing, edges, and locking tabs before making adjustments.
- Review oven rack placement: Count each rack position from the bottom upward. Choose a level that leaves enough clearance for your pan and allows the door to close without contact.
- Inspect side supports: Look for ridges, rails, or molded slots along both side walls. These features hold each rack at a selected height.
- Find support bracket locations: Identify the brackets, clips, or ladder-style tracks securing the rails. They should sit firmly against the cavity walls.
- Test the rack: Pull it forward gently, then push it back until it rests evenly. Lift the front edge only when the design permits removal.
Never force a rack past a stop. Let the oven cool before repositioning shelves, and consult your manual if the support system looks unusual or loose.
Spot the Oven Heating Elements
Next, take a look at the heating elements in your oven. You’ll usually find the bake element below the oven cavity and the broil element near the top. Noting where each element is located will help you understand how your oven heats food.
Identify Heating Element Types
Oven heating elements are the components that generate the heat needed for baking and broiling. To identify each type, examine its shape, surface, and function without confusing it with cooktop parts such as coil burners or electric ignition components.
- Bake element: This usually uses a thick metal tube designed to produce steady, even heat.
- Broil element: This element typically has a shorter, more exposed design that delivers intense, direct heat.
- Convection element: A separate heating ring works with a fan to circulate hot air for consistent cooking.
- Hidden element: Some ovens conceal the bake element beneath the oven floor, protecting it from spills while still providing radiant heat.
Check your owner’s manual if an element’s appearance seems unusual. Never touch an element until you’ve switched off power and allowed it to cool completely.
Locate Element Placement
To locate the oven’s heating elements, look along the ceiling, floor, or rear wall of the oven cavity. The upper element usually broils food and may appear as a thick, exposed tube near the roof.
The lower element typically bakes food and may sit beneath the oven floor, making it invisible. Some convection ovens also have a circular element around the rear fan.
Check your owner’s manual if you can’t see the element or aren’t sure which function it supports. Before touching any component, turn off the oven, unplug the range if possible, and let it cool completely.
Good Element placement helps you recognize each heat source, avoid blocking it with cookware, and practice better Stove safety. Never remove panels or test wiring unless you’re qualified to do so.
Compare Gas and Electric Stove Parts
Gas and electric stoves share familiar parts, but they heat cookware in different ways. As you identify each component, note how its design supports the heat source.
Gas and electric stoves share familiar components, but their designs reflect fundamentally different approaches to producing and distributing heat.
- Burners: Gas models use open flames beneath grates; electric models use radiant coils or smooth radiant elements under glass.
- Controls: Gas knobs regulate fuel and flame size. Electric controls adjust power sent through each element, often with digital displays.
- Oven heat: A gas oven uses a burner, while an electric oven uses a concealed or exposed heating element. Each design may include a thermostat.
- Connections: Gas models require a fuel line, shutoff valve, and ignition system. Electric models depend on electric wiring, heating elements, and circuit protection.
You’ll also find racks, doors, drip areas, and insulation in both types. For Gas safety, recognize the burner caps, grates, and flame ports.
When comparing parts, match labels to your model’s manual so you can identify compatible components accurately. This knowledge helps you understand your stove before servicing it.
Use, Clean, and Troubleshoot Stove Parts
You’ll learn how to use each stove part safely and effectively. You’ll also find simple ways to clean the components and prevent buildup. Finally, you’ll learn how to identify common problems and troubleshoot them with practical steps.
Using Stove Parts
Using each stove part correctly helps you cook safely and keep the appliance working well. Learn each control before you start, and match pans to the burner or heating element.
For strong stove safety, keep handles turned inward and use oven mitts for hot racks, doors, and cookware.
- Set burners to the lowest effective heat to improve Energy efficiency and prevent scorching.
- Center pans over the flame or element so heat spreads evenly.
- Use the oven’s temperature controls and timer instead of guessing cooking times.
- Turn every control off when you finish, and check that flames, indicators, and heating elements have stopped.
If a burner won’t ignite, an element stays hot, or a control feels loose, stop using that part.
Let it cool, then consult your manual or contact a qualified technician. Never bypass safety features or attempt repairs while power or gas remains connected.
Cleaning Stove Components
Cleaning each stove component regularly helps maintain even heating, prevent odors, and extend the appliance’s life. Unplug electric models and let every surface cool before cleaning.
Remove grates, burner caps, knobs, and drip pans, then wash them with warm, soapy water. Wipe the cooktop with a nonabrasive cloth, and keep moisture away from electrical controls.
For cooking safety, dry all parts completely before reinstalling them. Check your manual before using specialty cleaners.
| Component | Cleaning method | Frequency |
|---|---|---|
| Grates | Soak and scrub gently | Weekly |
| Burner caps | Wash and dry | Weekly |
| Cooktop | Wipe with cleaner | After spills |
| Knobs | Remove and wash | Monthly |
Regular Stove maintenance includes clearing crumbs from seams and cleaning the oven door’s inner glass. Don’t use steel wool or pour water into openings.
Clean filters or vents according to the manufacturer’s instructions to preserve airflow and safe operation.
Troubleshooting Common Issues
When a stove part doesn’t work as expected, start by checking whether it’s clean, dry, and installed correctly. Many problems have simple solutions, but always prioritize Kitchen safety.
Turn off controls, unplug an electric range, and let hot surfaces cool before inspecting anything.
- Burner won’t ignite: Clean the burner cap and ignition port, then confirm the gas supply or power connection.
- Uneven heating: Center the pan, level the grate, and remove food buildup from the burner.
- Oven temperature seems wrong: Check the door seal, avoid blocking vents, and test temperature with an oven thermometer.
- Strange noises or smells: Switch off the stove and contact a qualified technician, especially if you detect gas.
Regular appliance maintenance, including tightening loose parts and replacing damaged components, prevents repeat failures.
Don’t dismantle gas valves or electrical controls yourself. Record symptoms to help repairs go faster.
Frequently Asked Questions
How Often Should a Stove Be Professionally Inspected?
You should have your stove professionally inspected at least once a year, even if it seems to work properly. Schedule an earlier visit if you notice unusual odors, yellow flames, uneven heating, damaged cords, gas leaks, or repeated ignition problems.
During the appointment, ask the technician to follow an inspection checklist covering burners, connections, controls, ventilation, seals, and safety devices. Follow your manufacturer’s maintenance schedule, and don’t delay repairs when warning signs appear.
Can Stove Parts Be Recycled After Replacement?
Yes, you can recycle many stove parts after replacement because your old burner shouldn’t audition for landfill fame. First, check local recycling programs, which may accept metal grates, racks, burners, and wiring.
Follow disposal guidelines for glass, insulation, electronics, and gas components, since each requires proper handling. Contact your utility or a certified technician for gas valves and refrigerants.
Remove food residue, separate materials, and never dismantle pressurized parts yourself.
What Safety Certifications Should a New Stove Have?
Look for a stove certified by a recognized testing laboratory, such as UL, ETL, CSA, or your region’s approved agency. These marks show the appliance meets established standards for electrical, gas, and fire safety.
You should also verify compliance with current energy-efficiency requirements and local installation codes. Check the rating label, certification number, and manufacturer documentation before purchasing.
Don’t rely solely on retailer claims; confirm the certification independently online.
How Much Does Stove Installation Typically Cost?
You’ll typically pay $100–$300 for a standard electric or gas stove installation, while complex jobs can reach $500 or more.
First, picture the moment your new range arrives—then the hidden costs emerge: permits, electrical upgrades, gas-line work, ventilation, or hauling away the old appliance.
Ask for a written quote before scheduling. Professional installation protects your home, supports energy efficiency, and helps your appliance complement your kitchen decor safely and neatly.
Which Stove Brands Offer the Longest Warranties?
LG, GE, and Samsung often provide some of the longest standard stove brand warranties, typically covering parts for one year and select components longer. BlueStar, Fisher & Paykel, and Miele may offer stronger coverage on premium models, sometimes extending parts protection beyond the first year. You’ll want to compare each model’s written terms, labor coverage, exclusions, and registration requirements. If needed, you can add extended appliance coverage for additional protection after the factory warranty ends.
Conclusion
Once you can identify each stove part, cooking becomes safer and easier. You’ll know which burner to use, where heat comes from, and how to clean spills before they become stubborn problems.
But don’t stop at recognition: inspect knobs, grates, racks, and heating elements regularly. A loose part or damaged wire can hide a serious hazard.
Before your next meal, take one final look at all the parts of your stove. The smallest overlooked component may be the one that matters most.